Wincrea is free software (for PC) which is used to design stitch patterns for Passap E6000 knitting machines. You can download Wincrea and the user manual here. Wincrea uses .bmp files. If you are designing with Designaknit(DAK), and want to share your stitch pattern with someone who uses Wincrea, you need to save the file as a .bmp. Here are the steps to follow to save a .stp file as a .bmp
Open your file in Stitch Designer in DAK. Turn off the grid view and knitting pattern view if on. Go to edit/copy.
Open Gimp. Go to edit/paste.
Go to file/export as
Rename the file and be sure to add the .bmp file extension to the end of your file name. Click “export.” A pop up box comes up for export. Don’t change anything just click export again.
That is is. Find your file and open it in Wincrea.
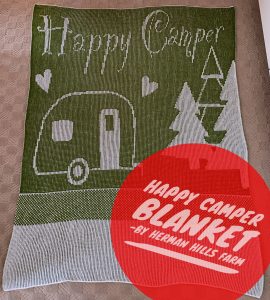
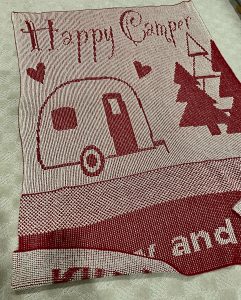
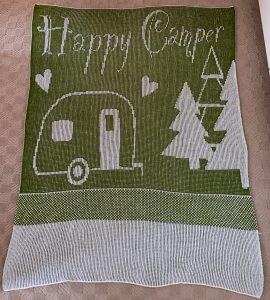
We often camp with our horses. I designed a “camping theme” blanket for our horse trailer camper. This Passap machine knitted blanket has been very popular with my “camping” clients. I have listed this pattern for fee for anyone who wants to knit some blankets for “happy campers!” This is a 2 color design. The blanket has room on the bottom border to add names or initials. There is room for 2 lines of text if needed. My finished blanket was 64″ wide and 84″ long and knit in one piece on a Passap.
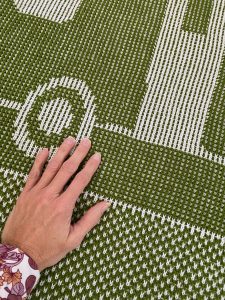
This blanket can be knit on any machine with 200 needles. I knit mine in double bed jacquard on a Passap E6000 T186. This is a large tuck throw with T186. If you want a smaller lap or cot size, knit the same file with T187. It will be smaller and the text will be more defined. This blanket can be knit on any electronic knitting machine with 200 needles. Japanese machines will knit a smaller blanket size. Cast on (#3 for Passap), T186, 88-0-88 total of 176 stitches double bed. Both end needles are on the back bed. 250 pattern rows and 1000 actual lock passes. This was knit with 2 strands 2/24 of each color tension 4.3 on both locks (Passap).
The “not so fine” print: Do not claim this pattern/digital file as “your” design. Do not share my pattern file or post the digital file online unless it is by sharing the URL link to my website/blog post. You can knit this blanket to sell. Items are knit to sell by small business less than 500 items a year…. I always appreciate sharing of my website name, Herman Hills Farm, when sharing your finished knitted items. …Just hoping others will find some use of my blog/tutorials too. Machine knitting is a dying art. 🙁 Thank you.
I often see knitters (online) asking how to cast off on the Passap when knitting double bed. I use a very easy cast off that leaves a nice edge. Read on for details….and see my video at the end of this post.
Simple Passap Cast Off:
For the cast off, I use the same yarn color as the cast on. After the last row of the stitch pattern, I start the cast off by knitting one row N/N right to left in one whole lock tension number looser/higher than main tension. (Example if you are at lock tension 4, you would go up to lock tension 5). I then transfer all back bed stitches to the front bed with the U100E (see my U100E blog post for details)..
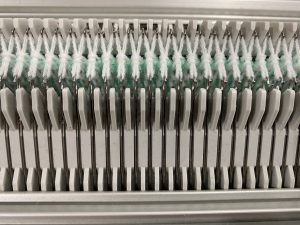
Next, I break the yarn and move the locks back to the right using GX/GX without strippers and without yarn. (This is a “free pass” and no knitting). Put the main yarn color back in the eyelet and knit one row right to left N/N another whole tension number higher (if you were at lock tension 5, you would go to 6). This puts loops (not really stitches) on the back bed as seen in the photo at the top of this post.
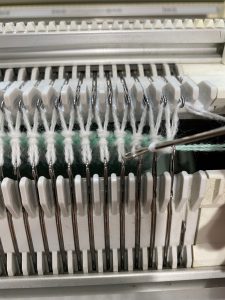
Drop the front knitting bed down and cast off on along the front bed (ignoring the back bed loops). Start the cast off on the right and continue to the left. This is a latch tool cast off (loop through loop) on the front bed (see photos below). This cast off has great stretch which is very nice for tuck patterns like T186.
After you have latched off across the front bed, push up all the back needles and drop the loops off the back bed. Next, push up the front bed needles and drop all the stitches off. That is it. All done. 🙂
The lock tension on the cast off rows may be different depending on which technique you are knitting. I always go a whole number looser lock tension for technique 186 and tuck patterns. For other double bed techniques, it may be fine to just go 2 clicks looser or maybe 3. You may want to swatch this and see what works best for you.