This pattern is written for a sock knit on a mid-gauge (Silver Reed 860) knitting machine. (There are notes for adjusting the pattern for a standard gauge machine.)
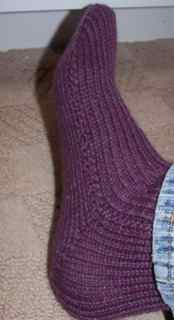 After many prototypes (and errors), I have finally knit a sock that fits me perfectly. The sock is knit to fit a size 9 foot. My feet are kinda skinny, so you may want to cast on a couple of extra stitches if you have a bigger foot circumference. (I have written some guidelines to follow for customizing your socks so they will fit YOU).
Before you start knitting, I want to let you in on a couple of sock tips.
Tip # 1 – If you are not sure of how many rows to knit for the sole of the foot, measure your foot from heel to start of the toes. This number of inches will be the number of inches you will knit on the machine before you start your short-row toe. For example, my foot measures 6 inches from the heel to the start of my toes. I knit my heel and knit the sole for “X” number of rows. I was not sure how many rows to knit when I first started my pattern, but after measuring my foot, I knew that I needed the sole to be 6 3/4 inches from the inside cup of the heel to the start of the short row toe.
Tip # 2 – Ok, so your foot obviously isn’t going to be the same size as mine. If you use this pattern, it will work for a size 9 foot. IF you modify this pattern and cast on extra stitches for a bigger circumference foot/leg, you will have the change the number of stitches that will be left unwrapped on the heel and toe. The following formula is how to figure out how many stitches to leave unwrapped.
Formula for unwrapped stitches:
Number of stitches cast on =________
Divide this number by 3
Subtract one
For example, if you have 21 stitches cast on, divide by 3 and that equals 7, subtract one and you get 6. You will leave 6 stitches unwrapped on the heel and toe.
Tip # 3 – I do not like sewing seams by hand. This sock pattern I have written is sewn up as you knit. (Mid/Bulky machines only. Standard gauge sew seam by hand.) You will be knitting your sock from the backside top leg, down the backside of the foot, to the heel and then down the sole (bottom of foot), knit the toe and then back up on the top of the foot to the leg.
After you knit the toe, you will be seaming the sole to the top of the foot as you knit along. As soon as you get finished with the short-row toe, you will pick up ONE loop on the OPPOSITE site of the carriage and hang it on the end needle.
Note For Standard Gauge Machine:
This pattern can also be knit on a standard gauge machine. You will have to cast on more stitches. The wrap formula will work the same.
Using Fingering weight yarn cast on 32 stitches Size 8 (34 size 9).
Local yarn shops have lots of nice fingering weight sock yarns suitable for the standard gauge machine. It is better to knit the standard gauge sock flat and sew the side seams by hand. You will not be hanging the edge stitches when knitting back up to the ribbing.
This pattern is my own original pattern I have written after knitting many prototypes. After you figure out the basics of short rowing, you will be able take this basic pattern and add you own “twist” to it. Have fun!
Tina’s Mid-Gauge Sock Pattern
Written step-by-step
I knit my sock on a Silver Reed SK 860 but any 6.5 gauge will work. (See note for standard gauge 4.5 machine above the title of this pattern.)
I used a light worsted weight yarn (Wool of the Andes by Knit Picks and Swish Superwash by Knit Picks). www.knitpicks.com (Note: the Swish Superwash can be washed in the washing machine. Wool of the Andes must be hand washed.)
Cast on 21 stitches (Carriage on Left)
Knit 20 rows– After these rows are knit, latch them up in a rib pattern. Be sure to keep track of what pattern you use so your ribbing will match when you sew up your side seams.
Knit 41 rows ending with your carriage on the right hand side of the bed. If your carriage isn’t on the right hand side, knit one more row to place the carriage on the right.
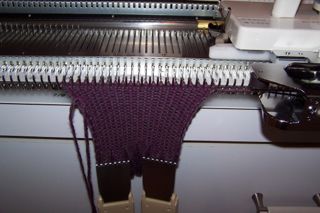 Set up carriage for short rows-place carriage on hold or russell levers on II. See your machine instruction manual for directions to set your particular machine to hold. Carriage on right. If your carriage is not on the right, knit one more row.
You will be short rowing down until 6 stitches are left unwrapped. See step-by-step directions for short rows below.
The photo to the (above) right shows what you should have knit to this point.
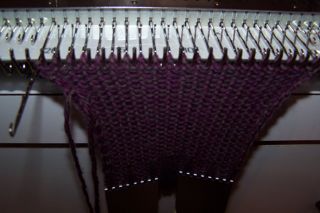 Now you have your carriage set to short row/hold and your carriage is on the right. You will now be manually wrapping stitches to make your heel.
Pull the left end needle out to hold. See photo on right.
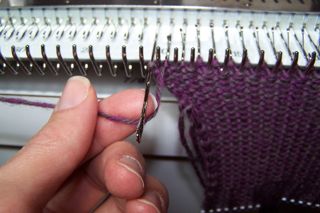 Now knit moving the carriage to the left. The needle in hold should not knit and the yarn will be going over the needle. You will now manually place the yarn under the needle. This is called wrapping the stitch. See photo on right.
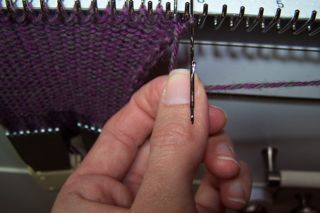 After you wrap your stitch, you will now pull the far right end needle to hold. Your carriage is on the left. Now knit moving the carriage to the right. The right end needle you just placed on hold has the yarn on top of it. Manually wrap the yarn under the needle. Photo right-wrapping stitch.
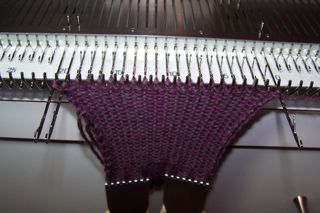 After you wrap the yarn under the needle, pull the second to next left end needle to hold. See photo on right.
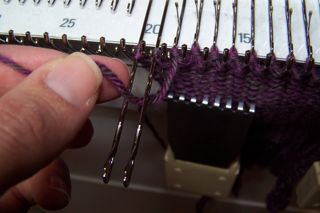 Knit, moving the carriage to the left. Wrap the yarn under the second to end left needle. See photo on right.
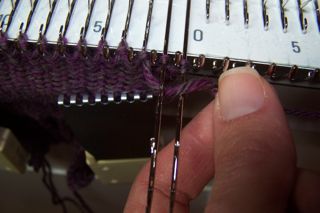 Now you have the carriage on left. Pull the second to right end needle to hold.
Knit, moving the carriage to the right, wrap the second to end right needle. See photo on right.
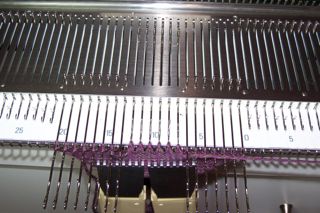 Have you noticed the pattern? Knit, wrap the yarn on the needle on the carriage side, pull the next needle opposite side of carriage to hold. Knit , Wrap , Pull.
I knit one row and I then wrap and pull. I also move the claw weights up as I knit.
You will continue in this pattern until you have 6 needles in work. The rest of the needles will be wrapped and in hold. The photo on the right shows all the necessary stitches wrapped and 6 stitches left unwrapped in the center.
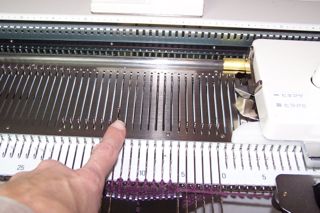 You will now start your increasing short rows out. You will be putting one stitch back in work each row.
In the photo above, I ended with the carriage on the right and had wrapped my last stitch. I will now put the innermost left hold stitch back in work and the knit the row. To put the stitch back in work. You need to put it in the C position (Silver Reed) or D position (Brother/Knitking). In the photo to the right, you can see how I put one stitch back in work from the hold position. You will be putting one stitch back in work on the opposite side from the carriage on each row until all the stitches are back in work.
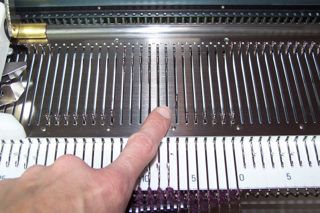 Note: As you are increasing your short rows out. You need to move your claw weight up about every other row to keep the stitches from dropping off the needles.
As you knit the heel of the sock, a pocket will form. You need to keep the weight on these stitches.
Photo on right-putting stitch back in work. (Carriage on left).
After you have all your stitches back in work, you are ready to knit the sole of your sock. Take the carriage off “hold” and set for plain knitting.
Sole of the sock-Be sure the carriage is set for plain knitting. Reset your row counter so you can keep track of how many rows you knit for “your” sole.
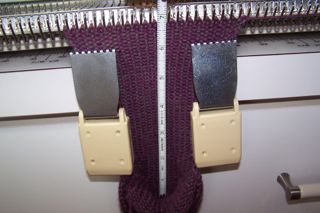 How many rows you knit for the sole of your sock, depends on what the length of your foot is. How many inches is it from the heel to the start of your toes? (Place the measuring tape on the bottom of your foot and measure from the end of the heel to the start of the toes.) My measurement is 6 3/4 inches. For my first socks, I was not sure how many rows to knit, so I simply put the tape measure in the cup of the heel of the sock and measured my knitting as I knit along until I got to 6 3/4 inches. See the photo to the right for clarification.
In the photo (above right), the start of the measuring tape is set in the cup of the heel and I kept knitting until I got to 6 3/4 inches.
Short Row Toe– You will knit your short row toe exactly the way you knit your heel. See heel directions above. Set machine for short row/hold and leave 6 stitches unwrapped.
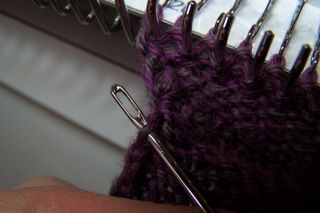 Top of Sock– After you knit your toe, you will be knitting the top of your sock back up to the ribbing. As you knit the top of the sock, you will be hanging edge stitches from the sole so that your sock will be seamed up when you get to the ribbing.
You are done knitting the short row toe. You will hang one stitch from the edge opposite the carriage each row. If your carriage is on the right, you will hang one stitch from the left edge up on the left edge needle (this needle will now have 2 stitches on it) and then move the carriage to the left. Then hang one stitch from the right edge and knit to the left. The stitches will be below the the stitch that is hanging on the needle. It will be between what looks like two knots. I have a photo in a different color to help show where the stitch is. After you hang a few 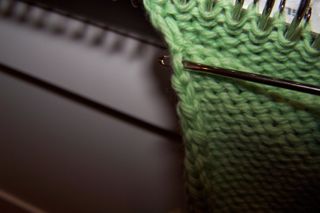 stitches, it will get easier to see the knots. It gets a little tricky around the heel but it is not too difficult to figure out.
Continue knitting and hanging one stitch on the opposite side from the carriage until you knit all the way back up to the ribbing.
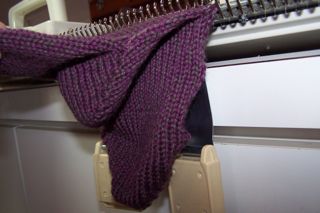 Note: I hang my claw weights on the backside of my knitting while hanging the edge stitches.
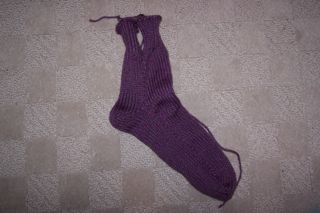 Ribbing – Now you are back up to the ribbing. You are finished hanging the side stitches. Knit 20 rows and latch back up for ribbing.
Your sock is finished!. You will just have to sew up the seams on each side of the ribbing.
Knitting socks should now be as clear as mud. Good luck!
Visit my website at www.hermanhillsfarm.com for Wensleydale and Cormo fleeces, hand-dyed spinning fibers, and hand spun yarns!
